

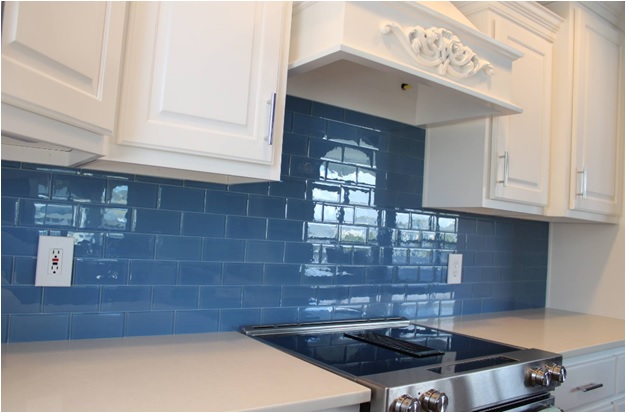
Are you looking for an easy, cost-effective way to instantly transform your kitchen? Installing a vinyl tile backsplash is the perfect solution! Peel and stick vinyl tiles are self-adhesive, with PU glue on top and backed with strong adhesive, making them the easiest, fastest, and most affordable way to tile a surface or create a quick mosaic backsplash.
In just one day, you can add a stylish, custom look to your kitchen. Read on to learn how to install a peel and stick vinyl tile backsplash in your kitchen in just one day.
Are you looking for an easy and affordable way to give your kitchen a makeover? Installing a peel and stick vinyl tile backsplash is the perfect solution! Not only is it quick and simple to install, but it can be done in just one day.
With the help of vinyl tile for backsplash, you can transform your kitchen from dull and drab to modern and stylish with a splash of color and a pop of texture. So if you’re ready to give your kitchen a makeover in just one day, follow this guide to learn how to install a peel and stick vinyl tile backsplash!
Tools and Materials You’ll Need
Installing a peel and stick vinyl tile backsplash is a great way to give your kitchen a new look without the hassle of dealing with messy grout. With just a few tools and materials, you can install your own peel and stick vinyl tile backsplash in just one day!
Before you start, here is a list of tools and materials you’ll need:
– Tape measure
– Pencil or marker
– Utility knife
– Straight edge
– Peel and stick vinyl tiles
– Sponge or cloth for cleaning
– Adhesive remover (if necessary)
Once you have gathered the necessary tools and materials, you’re ready to start installing your peel and stick vinyl tile backsplash. The process is simple and requires only basic tools. To get started, make sure your surface is clean and free of any dust or debris. Using your tape measure, mark off the area where you want to install the tiles. Use the level to ensure that the surface is even before placing the tiles.
Now it’s time to start laying down the tiles! Start at one corner and work your way out in a grid pattern, making sure to line up the edges evenly. Use your utility knife to trim any excess tiles. To finish, use a damp cloth to clean the surface and ensure that all tiles firmly adhere.
And that’s it! With a few simple steps, you can transform your kitchen in just one day with a peel and stick vinyl tile backsplash.
Preparing the Surface
Before installing your peel and stick vinyl tile backsplash, it is important to properly prepare the surface. You should always start by thoroughly cleaning the area. Use a damp cloth to wipe away any dirt and grime, then let the surface dry completely. It is also important to make sure that the surface is even and level before you start tiling. Any bumps or irregularities should be sanded down so that the tiles will stick properly. Once the surface is prepared, it is time to start tiling!
Measuring and Cutting the Tiles
Before you begin to install your peel and stick vinyl tiles, it’s important to measure and cut the tiles so that they fit correctly in your kitchen. To do this, measure the surface where you plan to install the tiles, taking into account the size of each tile and any obstacles in the area.
Once you have determined the size of the surface you need to tile, use a ruler or measuring tape to draw a grid on the surface to help guide you when cutting the tiles. When you have determined where you need to cut each tile, use a sharp utility knife to carefully cut each piece of tile to size.
To ensure that your cuts are as precise as possible, use a straightedge as a guide when cutting the tiles. This will help you get clean, straight lines and keep your tile installation looking neat and professional. Once all of your tiles have been cut, you are ready to start installing them in your kitchen.
Applying the Tiles to the Wall
Installing a peel and stick vinyl tile backsplash in your kitchen can be a quick and easy project. All you need is a few tools and some patience. Here are the steps for applying the tiles to the wall:
- Start by cleaning the wall thoroughly with an all-purpose cleaner or vinegar and water. This will help ensure that the tiles will stick properly.
- Measure out the area you want to cover, then plan your layout. Use a ruler and a pencil to mark out the lines for where each tile will go.
- Peel the backing off of the first tile and apply it to the wall at one of your marked points. Be sure to press firmly around the edges to ensure it sticks properly.
- Continue with this process until all of your tiles are applied. Make sure that they line up with each other and create a nice pattern.
- Once you have all of the tiles applied, use a grout sealer to seal around each of them. This will help keep them in place and prevent any moisture from getting underneath them.
And there you have it! With just a few simple steps, you can install a beautiful new backsplash in your kitchen in just one day.
